Today’s Fibre Friday post is a bit late because I had to wait for some sunshine to take my pix. It’s a beautiful day here, so I finally managed to get those pix to share these projects with you.
I’ve been sewing some project bags for my knitting.
First, let’s talk about the little ones. These are great for small projects, like socks. There’s a tutorial at Very Shannon Knits, and I mostly followed the plan. My big change for these first two was to add a loop, so the project bag could hang on my wrist or the arm of a chair. Also, instead of twill tape, I used grossgrain ribbon for the drawstrings. There’s another change that I’ll explain later on.
Of course, I had plenty of fabric in my stash.

The first one I made is in black and pink at the top left. This one (ahem) has a mistake. I used 5/8″ seam allowances instead of 1/4″ and so it’s a bit smaller than it should be. The interfacing I used on this one is pretty sturdy, too, so it’s more like a box than a bag. The design is reversible, so I put a loop on the inside, but I won’t turn it around with that interfacing.
To add a loop – like the one you can see clearly on the blue bag at the top right – cut a piece of fabric 12″ x 1.75″. Press in 1/4″ on each long edge, then press it in half. Edge-stitch down both long edges. Fold it in half, so the raw edges are together. I wanted mine to be at one of the corners of the bag, so I tucked the raw edges into the seam between the top and bottom exterior pieces about 3″ from the edge. Since I pressed the seam allowances down, the loop goes up.
A second modification: when sewing one side seam of the exterior, I left a gap in the sewing near the top. (Stitch half an inch, backstitch, then start stitching again an inch below the backstitching.) That left an opening for the ribbon to be fished through the casing. When the seam is pressed open, it looks almost like a buttonhole.
Part of the reason that this one has bigger seam allowances is that I didn’t read the pattern all the way through. (Oops.) I just did my usual bag-making thing once the shapes were cut out. So, I turned the bag through an opening in the bottom seam in the lining, which I then sewed up by hand – as soon as I’d done that, I realized there was an easier way that would require no handstitching.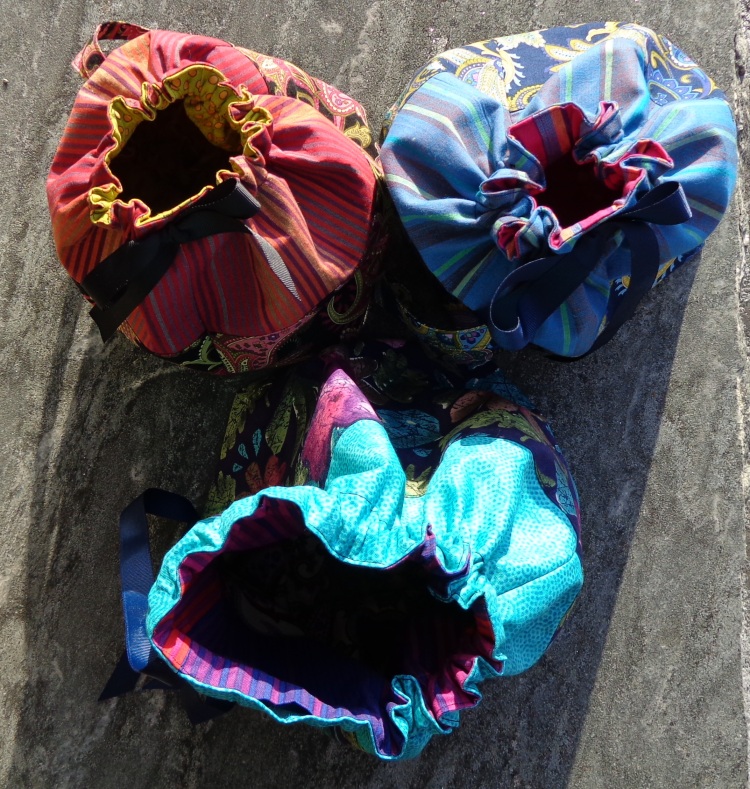
For the second one, in blue at the top right, I got the seam allowances right and used a softer interfacing. I also used my no-handstitching method. I made the bag exterior and the lining, then pressed down the seam allowance on the top edge on both pieces. I put them together, wrong sides together, just as they would be in the finished bag. I edge-stitched all the way around the top, sewing them together, then stitched again 1″ away. That made the casing for the ribbon and finishing the bag. (Ha.)
Once I had the hang of things, I made the bigger bag in turquoise at the bottom. (I tend to knit sweaters, not socks.) I sized up from a 12″ square to a 15″ square and made the cut-out corners bigger. I used the softer interfacing on this one and I like how it turned out. I think I might make an even bigger one next, just for fun – it will have zippered pockets.
And the final project for today is an up-cycled bag. One of the frustrating things about handknit socks is that I always walk a hole in the bottom of each sock. The foot wears out when the leg part is still fine. 😦 All that knitting! Some yarns wear out faster than others, too. When I really like the yarn, I’m not good at tossing out these socks. I wash them in hot water so they felt a bit, then I add them to my stash.
I’ve cut pieces from these felted socks for the pockets on other felted bags, but decided to make a bag from those socks. Here it is:
 Most of these socks were knit in Noro Kureyon Sock. (Who can throw out Noro? Not me.) I dug some coordinating pairs out of my dead sock stash. This took six pair. I cut off each sock at the start of the heel, then sliced open the leg to make a square. Those were about 8″ by 8″ each. I cut some of them smaller to make a pattern I liked. I sewed the squares together so I had a piece big enough for a tote bag and added a bottom in fabric.
 I reinforced the bottom and added feet. One of my favorite reinforcements for the bottom of a tote bag is a piece cut from these plastic cutting boards from Ikea. I always buy another package when I’m there. The colours change all the time, but it doesn’t matter when it’s inside the bag. (It ends up between the bag and the lining, so isn’t visible.) You can cut these to size with a utility knife, then make holes with an awl for the feet. Round the corners, too, so it doesn’t poke through the bag.
I lined the bag – adding a zippered pocket, of course – put some piping in the seam between the bag and the lining, and added a drawstring top. It even has a dragon charm. 🙂 I sewed leather handles on it (reinforcing them with canvas on the inside) and ta da! The socks live on!
It needs just one last step – a line of top-stitching below the piping to keep the drawstring part from puffing out. I’m pleased with it though and certainly have enough felted socks to make another.
What have you been sewing lately?


Love these, so colourful… I would so use one of these purses. Love the dragon touch 😀
LikeLike
Oh, I love all of these! I think I should put making project bags on my list of things to do after my upcoming trip!
LikeLike